Working with Software Modules
An Account Group is a collection of similar types of accounts which are grouped under one account group.
For Example: All Expenses and Income accounts are grouped under the Revenue Account Group.
To create an account group, Click on “Masters > Account > Account Group”, the following screen will be appeared:
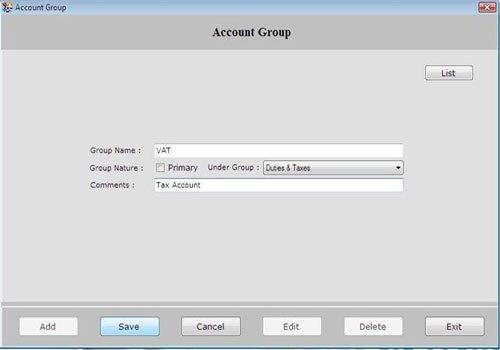
Account Group screen contains the following fields:
-
Group Name: Enter the name of account group.
-
Group Nature: Select the nature of the group whether it is Primary or Under Group.
Primary Group is at the top most level of group hierarchy and does not come under any other account group. Primary Groups are those groups which are displayed in Balance Sheet Report.
Note-> This field becomes active when you select the group nature as a Primary.
Under Group: This field becomes active when you don’t select the group nature as primary. Select the group under which you want to create sub-group.
- Comment: Enter the other information of account group.
After creating Account Group, click on “Save” button to save the information.
The following buttons are used in Account Group window:
-
Add: To add new entry.
-
Save: To save the data.
-
Cancel: To cancel particular operation.
-
Edit: To edit existing records.
-
Delete: To delete the record.
-
Exit: To exit from current window.
-
List: To generate a list of all existing records.
If you want to view the details of created account group then select that account group from the list and press enter or double click.
If you want to take print of existing records, click on “Print” button.
